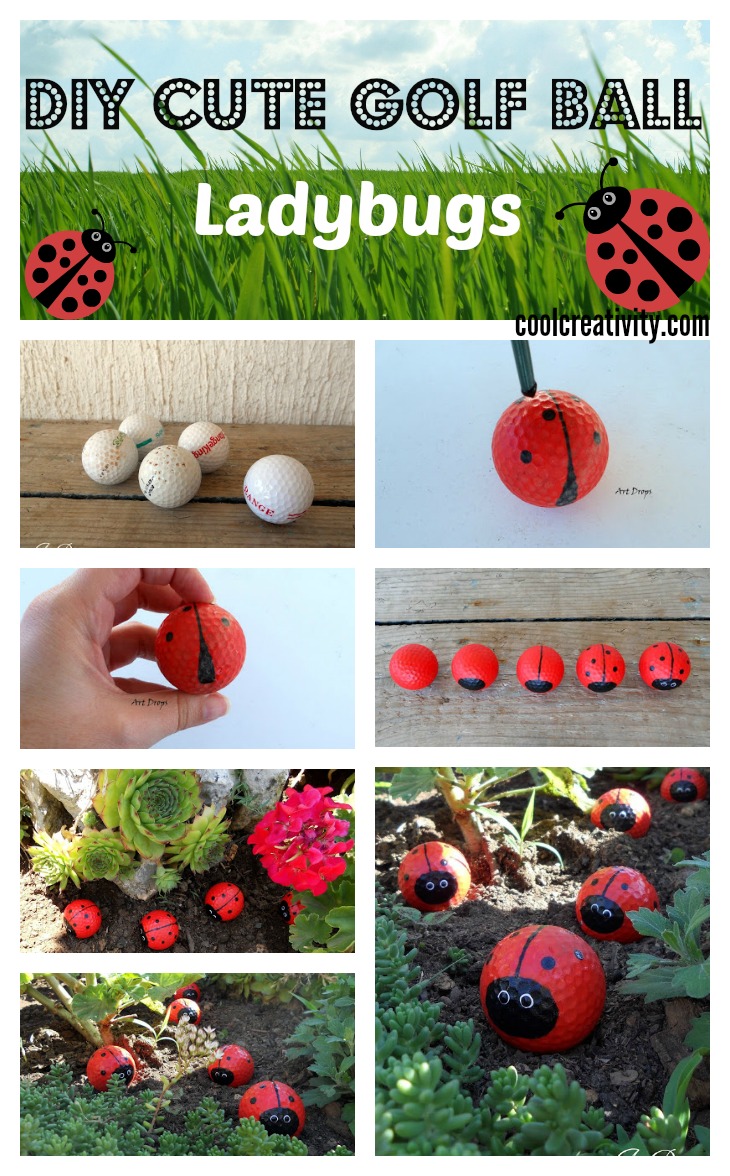
Looking for some projects for kids to have some fun during summer time? Here is an easy Golf Ball Ladybugs project you can try. This cute ladybug craft is one of the best ways how golf balls can be repurposed. You can use them to decorate your garden beautifully,
What You will need for Golf Ball Ladybugs:
- Plastic balls (such as golf balls),
- Primer spray paint
- Red and black acrylic paint,
- Paintbrush
- Varnish.
Instructions:
- To begin, find some old golf balls. You can find these at any thrift store or even in your own garage. If you would rather use something else, just about anything spherical in shape will do the trick.
- Begin by sandpapering the golf balls everywhere. They need to have no extra gloss. Then, take some primer and spray it over the surface of the golf balls. This will allow paint to adhere to the surface without slipping or running.
- When the primer has dried, it is time to paint the golf balls. Get some acrylic pain in red, black and white.
- First, apply everywhere around the ball. Wait for the paint to dry, then paint the face and wings. The white is for little eyes in the front!
Put these adorable bugs anywhere. They go great in soil, or they can hide in rocks! They’re hilarious decorations!
Click below link for translated tutorial…


